
Admins can add, edit and remove users and groups in Settings. This matters because staff only see students in the groups they belong to, and surveys are sent by group and year.
Does your school sync with Wonde? Use Managing users and groups with Wonde instead. Changes made here are replaced at the next sync.
Finding users
- Go to Settings → People.
- Search by name or email, or filter by Role, Group or Year, then click Filter.

Each row shows the user's role, groups and year levels. Use the pencil to edit a user and the bin to remove them.
Adding a single user
- Go to Settings → People and click Add new user.
- Enter their first name, last name and school email address. The email must match their Google, Microsoft or ClassLink login if your school uses SSO.
- Choose their role for Student Wellbeing (Student, Staff or Admin) and, if you have it, Staff Wellbeing.
- Add their Groups and Year Levels.
- Set a password, or click the key icon to generate one. A password is needed even if they will sign in with SSO or a QR code. They won't need it if they use SSO.
- Click Create user.
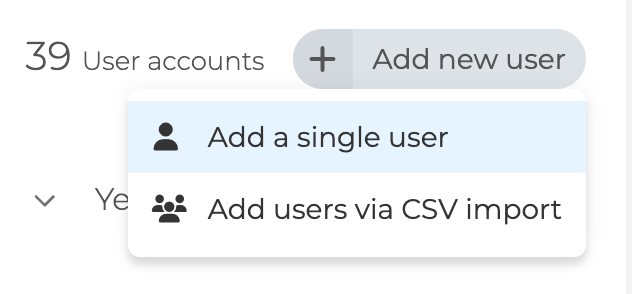
Adding lots of users with a CSV
Best for setting up a new school year or a trial. Large files can take a few minutes.
- Go to Settings → CSV Import and download the template.
- Fill in one row per user. First Name, Last Name, Email, Gender and Role are required. Each email must be the user's own school email, with no spaces or typos.
- Fill in Year and Group too. Without them, users miss surveys sent to their year or group. For staff, list every class or group they should see, including all the classes a head of year oversees.
- Upload the file and match your columns to Komodo's.
- Manage groups: choose a type for each group, such as Registration, Year, House, Campus or Misc. You can set them all at once or one by one.
- Click Match and create all. Each group shows as Existing or New. Check the existing ones before you go on, so you don't create near-duplicates.
- Review users in the import editor. Fix any highlighted rows, or download them to fix and upload separately.
- Import, and stay on the page until it finishes. Leaving the page stops the import.
- Group names must match exactly. "7b" and "7B" create two separate groups.
- A CSV upload adds and updates, but never removes. Old groups and memberships stay. For a new school year, delete last year's class groups in Settings → Groups first. Deleting a group doesn't delete its students or their data.
- Keeping custom groups: include houses or focus groups in the Group column for everyone who should stay in them.
- Common errors: a missing or misspelt email, two users with the same email, or a required column not matched.
Editing a user
- In Settings → People, click the pencil next to the user.
- Update their name, email, role, groups or year levels.
- Click Update user, then ask them to sign out and back in.
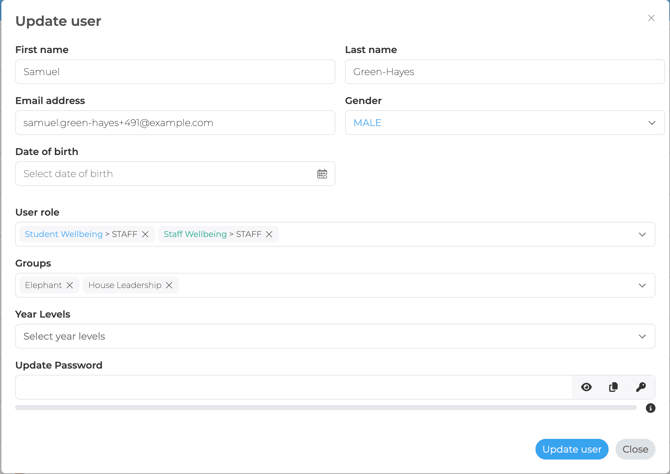
- Changing an email address: edit it here. The user then signs in with the new email.
- "Already exists" error: each email can belong to only one account. Search for the email in Settings → People, as the person may already be in Komodo. If you can't find the account, contact support.
- Resetting a password: click the pencil, then Update Password. Enter the verification code sent to your email, then click Update user.
- Preferred names: there's no separate field. Put the name the student uses in First Name.
Removing a user
- In Settings → People, click the bin next to the user. To remove several, tick them and remove them together.
- Click Remove to confirm.

There is no restore button, so check the person has left first. If you remove someone by mistake, add them again with the same school email and contact support straight away. Removing someone from a group doesn't remove them from Komodo.
Managing groups
A group can be any cohort: a class, tutor group, house, boarding group or focus group. Go to Settings → Groups to create, rename or delete groups, and to add or remove members.
- Deleting a group doesn't delete its students or staff, or their data.
- Moving a student to another group keeps all their data. If the new group gets a different survey, they'll receive it when it's next due.
- To give a staff member access to more students, add them to more groups: Settings → People → pencil → Groups, or Settings → Groups.
Troubleshooting
- A staff member sees no students: check they're in at least one class or registration group, not just a year, and that the filters at the top right aren't hiding anyone. Being an admin doesn't show every student.
- Students are in old and new classes: last year's groups weren't deleted before the new CSV. Delete the old groups in Settings → Groups.
- A student missed a survey: check they have a year and the right group. Surveys go to groups and years.
- Last year's data: history follows each student's school email, so it carries over as long as the email stays the same.
Doing this at the start of the year? Follow Admin checklist, Steps 2 and 3. See also Admin roles and permissions.
